How-to guides
Managing Security Groups
By default, each project has a default security group that can be assigned to each VM. In this guide, we will show you how to enable SSH connection via the security group.
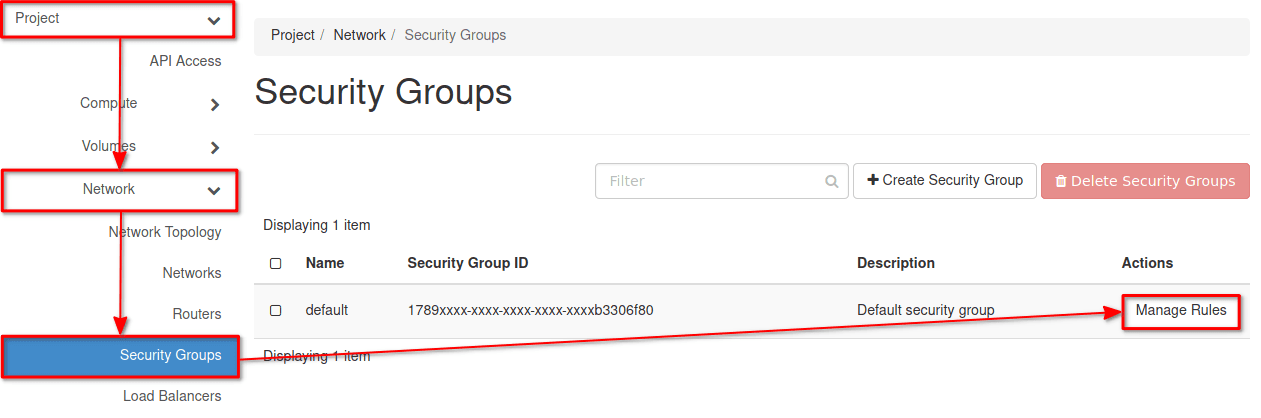
1. Go to Project > Network > Security Groups. Click on Manage Rules, for the default security group.
Example
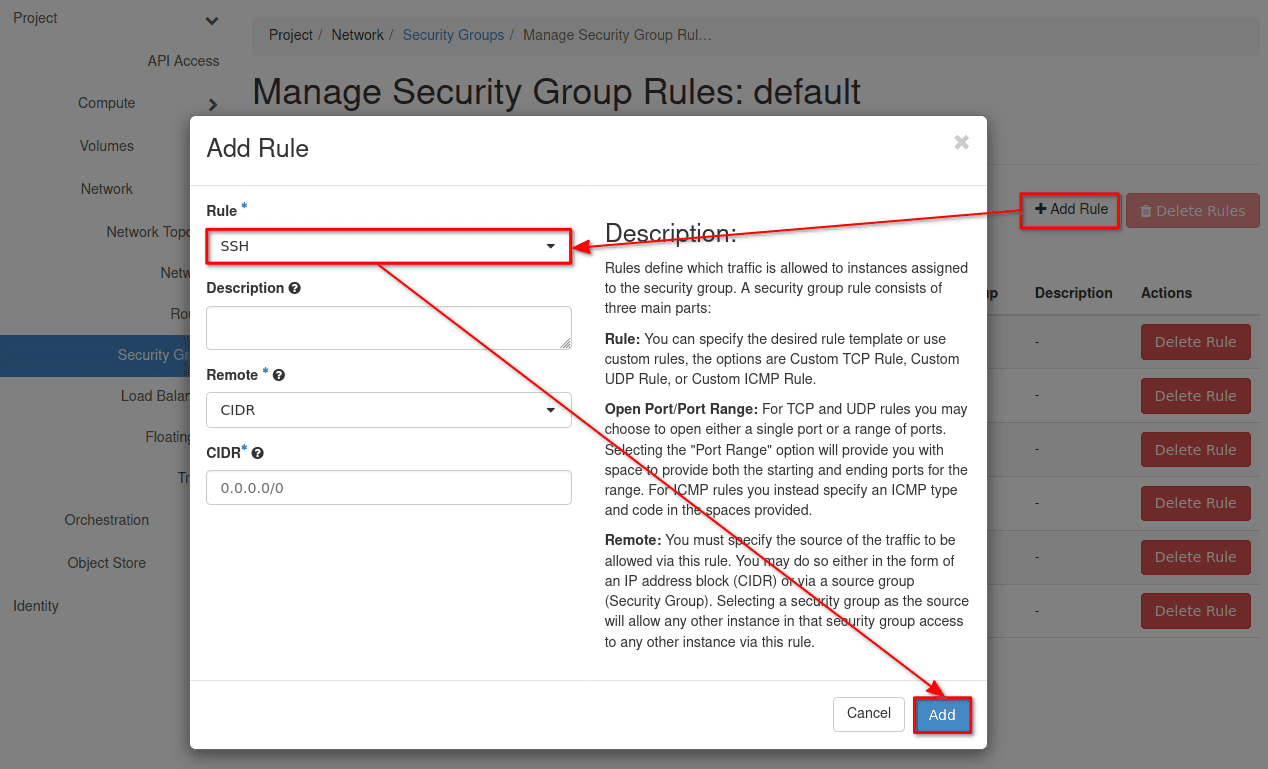
2. Click on Add rule, choose SSH, and leave the remaining fields unchanged. This will allow you to access your instance via IPv4.
Example
Caution
You have 2 possibilities for how to configure security groups policy.
- One is through CIDR which specifies rules for concrete network range.
- The second one specifies rules for members of a specified security group, i.e. policy will be applied on instances that belong to the selected security group.
For details, refer to the official documentation.
Last updated on